Have you ever noticed tiny dust spots or smudges in your photographs, even after cleaning your camera lens? Chances are, the culprit is a dusty sensor inside your camera body. While it might seem daunting, regularly cleaning your camera sensor is crucial for maintaining optimal image quality. Enter the camera blower – a simple yet invaluable tool that every photographer should have in their kit.
A camera blower is a small, handheld device that uses a concentrated stream of air to dislodge dust and debris from the delicate sensor inside your camera. Unlike compressed air or cloths, blowers are a safe and effective way to clean your sensor without risking scratches or damage. Regular use of a camera blower can ensure that your precious gear stays in top condition, allowing you to capture stunning, blemish-free images.
Here’s a step-by-step guide on how to use a camera blower properly:

Step 1: Preparation
Before you begin the cleaning process, gather the following items:
- Camera blower (rubber bulb or battery-powered)
- Camera body (with the lens detached)
- Microfiber cleaning cloth
- A clean, dust-free environment
It’s crucial to work in a controlled space free from airborne particles or wind currents that could potentially reintroduce dust onto your freshly cleaned sensor. Consider setting up a designated cleaning area or working in a bathroom after running the shower to create a temporarily particle-free zone.
Additionally, consult your camera’s manual for specific instructions on sensor cleaning and compatible cleaning supplies. Many manufacturers provide detailed guidelines to ensure safe and effective cleaning procedures. If you don’t have a physical copy of the manual, you can often find it online through the manufacturer’s website or by searching for “[camera model] manual PDF.”
Step 2: Camera Positioning
Once you have your workspace prepared, turn off your camera and detach the lens. This step is essential to access the sensor area and prevent any inadvertent damage to the lens or camera body during the cleaning process.
Next, position your camera with the sensor area facing downwards. This allows gravity to assist in dislodging any dust particles, making the cleaning process more efficient. However, different camera types may require slightly different positioning techniques.
For DSLR cameras, you’ll typically need to open the mirror box to access the sensor directly. Consult your camera’s manual for specific instructions on how to do this safely.
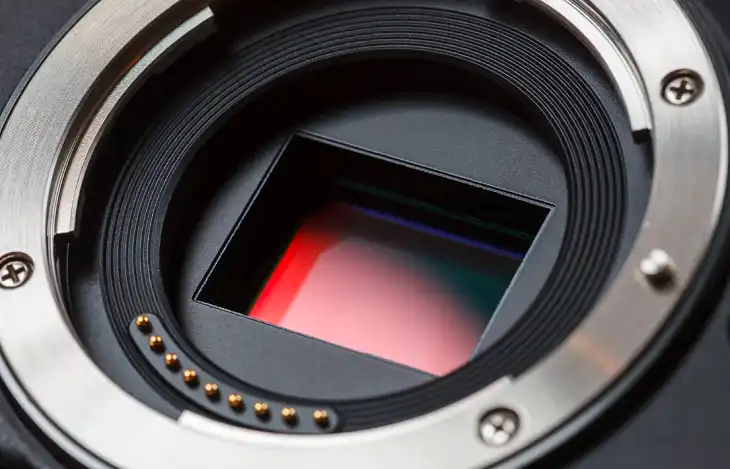
Mirrorless cameras have exposed sensors
Mirrorless cameras, on the other hand, often have the sensor exposed when the lens is detached, making the cleaning process more straightforward. However, you may still need to adjust the camera’s positioning to ensure optimal access to the sensor area.
To prevent any accidental drops or damage, consider using a camera strap or placing your camera on a flat, clean surface during the cleaning process.
Additionally, if you have a full-frame or crop sensor camera, the positioning of the sensor area may vary slightly. Refer to your camera’s manual or online resources for specific guidance.
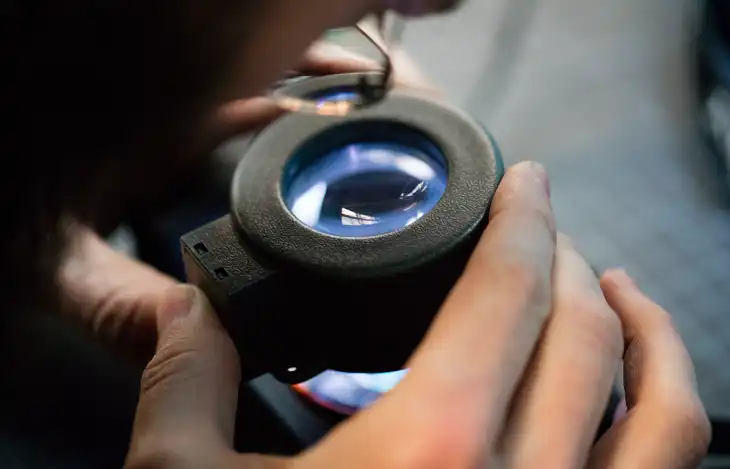
Using a loupe to inspect the camera sensor
Using a loupe or magnifier can also be helpful for inspecting the sensor area and ensuring a thorough cleaning. Many photographers recommend using a sensor loupe or jeweler’s loupe for this purpose.
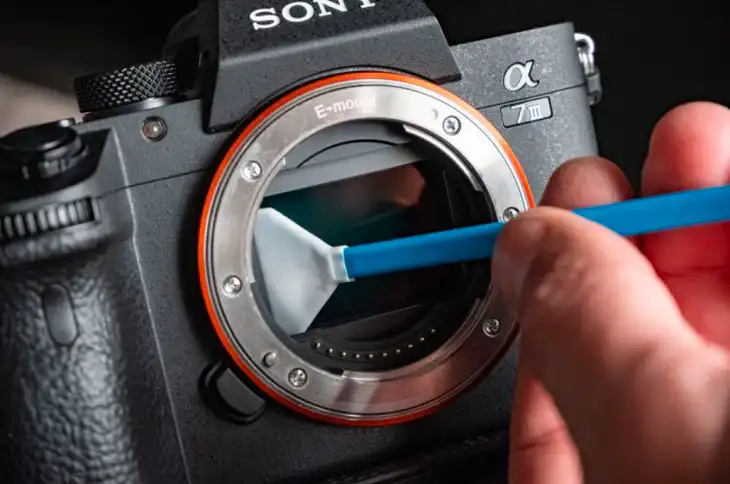
Step 3: Using the Blower
Now, it’s time to put your camera blower to work! There are two main types of camera blowers: rubber bulb blowers and battery-powered blowers.
Rubber Bulb Blowers:
- Grip the blower firmly and squeeze the bulb to expel a burst of air.
- Hold the blower nozzle approximately 2-4 inches away from the sensor area, angled slightly to avoid directly blasting the sensor.
- Squeeze the bulb in short, controlled bursts, rather than a continuous stream of air.
- Repeat this process from different angles to ensure comprehensive cleaning.
Bulb Blowers with Directional Nozzles: Some camera blowers feature a detachable, directional nozzle for more precise air flow. If using this type of blower, carefully follow the manufacturer’s instructions for proper nozzle attachment and usage.
While using the blower, never touch the sensor area with the nozzle or any other cleaning tool. This can easily scratch or damage the delicate sensor, potentially leading to costly repairs or replacements.
Step 4: Using Sensor Swabs
If you encounter stubborn dust particles that resist the blower’s air flow, resist the temptation to use brushes or cloths directly on the sensor. These can often cause more harm than good, potentially scratching or creating static charges that attract more dust.
For heavily soiled sensors or particularly stubborn debris, consider the following alternative cleaning methods:
Sensor Swabs: Sensor swabs are specialized cleaning tools designed for advanced sensor cleaning. However, using these swabs requires thorough research and a delicate touch to avoid damaging your sensor. Consult professional resources or consider seeking the assistance of a qualified camera technician if you’re unsure about proper swab usage.
It’s also important to note that compressed air cans should never be used for sensor cleaning. The propellants in these cans can potentially introduce moisture or other contaminants onto the sensor, causing more harm than good.
Step 5: Cleaning the Viewfinder and Camera Body
While you have your camera blower out, take a moment to gently clean the viewfinder and exterior of your camera body as well. Dust and debris can accumulate in these areas, potentially affecting the overall performance and usability of your gear.
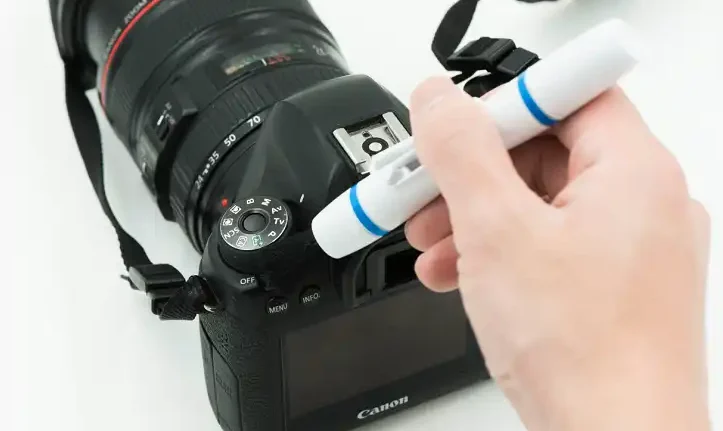
To clean the viewfinder, hold the camera at an angle and use short bursts of air from the blower to dislodge any particles. For the camera body, use the blower to remove dust from various nooks and crannies, such as the grip area, dials, and hot shoe.
After using the blower, you can gently wipe down the exterior of the camera body and lens with a clean, microfiber cloth. Avoid using this cloth on the sensor area, as it can potentially scratch or smear any remaining debris.
Step 6: Inspection and Repeating
Once you’ve completed the initial cleaning process, it’s time to inspect your work and repeat as necessary. Using a loupe or magnifier, carefully examine the sensor area under angled lighting to check for any remaining dust particles.
If you notice any stubborn spots or smudges, repeat the blowing process from different angles, focusing on those specific areas. Don’t be discouraged if it takes a few rounds of cleaning to achieve a spotless sensor – patience and persistence are key.
If, after multiple attempts, you’re still struggling with persistent dust or debris, it may be time to consider alternative cleaning methods like sensor swabs or professional cleaning services.
Parting Words
Regularly cleaning your camera’s sensor with a blower is an essential task for any photographer who wants to maintain optimal image quality and protect their valuable gear. By following the steps outlined in this guide, you can effectively and safely remove dust and debris from your sensor, ensuring that your photographs are free from unsightly spots or smudges.
Proper camera maintenance goes beyond just cleaning the sensor – it’s about preserving the longevity and performance of your gear. By incorporating regular sensor cleaning into your routine, you’re not only safeguarding your investment but also ensuring that your creative vision can be captured with stunning clarity and detail.