If you’re looking to step up your cinematography game, getting comfortable with a 4×5.65 polarizer is a must.
These big rectangular filters are like the pro version of the circular ones you might screw onto a photo camera, but they’re built for the big leagues of filmmaking. Don’t worry if it seems a bit daunting at first – we’ll break it down for you.
The trick to nailing the use of a 4×5.65 polarizer is all about how you set it up in your matte box. Unlike those screw-on filters, you’ll need to rotate these bad boys to get the effect you want.
Most matte boxes have a nifty gear system that lets you tweak the filter’s position, even while you’re rolling.
When you get it right, a 4×5.65 polarizer is like a magic wand for your image. It can zap away annoying reflections, make skies pop, boost colors, and give you more control over contrast.
It’s the kind of tool that can really make your shots stand out. So, let’s dive in and get you up to speed on using these filters like a pro. Trust us, your footage will thank you!
Understanding Polarizer Filters
Let’s dive into the world of polarizer filters and demystify how they work their magic on your shots.
How Polarizers Work
Imagine light as a bunch of waves bouncing all over the place. A polarizer filter is like a super-selective bouncer at a club, only letting in light waves that are vibrating in a specific direction.
This selectivity is what gives polarizers their power to transform your image. When light hits a non-metallic surface (like water or glass), it gets polarized, meaning the reflected light waves are now vibrating in one predominant direction.
Your polarizer filter can block these reflected waves, effectively cutting glare and reducing reflections.
This is why polarizers are a cinematographer’s best friend for those tricky outdoor shoots or when dealing with shiny surfaces.
But that’s not all – by filtering out certain light waves, polarizers can also:
- Boost color saturation, especially in skies and foliage
- Increase contrast in your image
- Cut through haze in distant landscapes
Difference Between Circular And Linear Polarizers
Now, you might hear about two types of polarizers: circular and linear. Despite the names, they both look like flat filters – the “circular” part is about how they affect the light, not their shape.
Linear Polarizers
- The OG polarizer design
- Great for manual focus and exposure settings
- Can interfere with autofocus and metering systems in modern cameras
Circular Polarizers
- The new kid on the block
- Works well with autofocus and modern metering systems
- Adds an extra quarter-wave plate that “uncircularizes” the light after it’s been polarized
For most modern cinema cameras, you’ll want to go with a circular polarizer. It gives you all the benefits of polarization without messing with your camera’s focusing and metering systems.
Remember, whether you’re using a circular or linear polarizer, the 4×5.65 size we’re talking about here is all about fitting into those pro matte boxes.
The principle remains the same – it’s just a larger piece of glass to cover those bigger cinema lenses.
Understanding how polarizers work and the difference between types will help you choose the right tool for your shoot and use it effectively to capture stunning, glare-free footage.
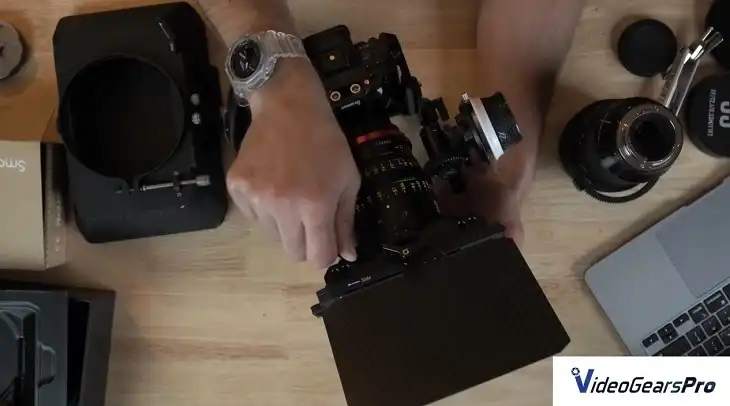
Mounting the 4×5.65 Polarizer
Alright, let’s get hands-on with how to actually set up your 4×5.65 polarizer. This isn’t like slapping a screw-on filter onto a DSLR – we’re talking pro-level gear here.
1. Compatible Matte Boxes And Filter Holders
First things first, you need a matte box that can handle 4×5.65 filters. Some popular options include:
- Arri LMB 4×5
- Bright Tangerine Misfit
- Tilta 4×5.65 Clamp-On Matte Box
- Wooden Camera ZIP Box Pro
These matte boxes typically have multiple filter stages, with at least one rotating stage for your polarizer. Make sure your chosen matte box is compatible with your camera setup and lens diameter.
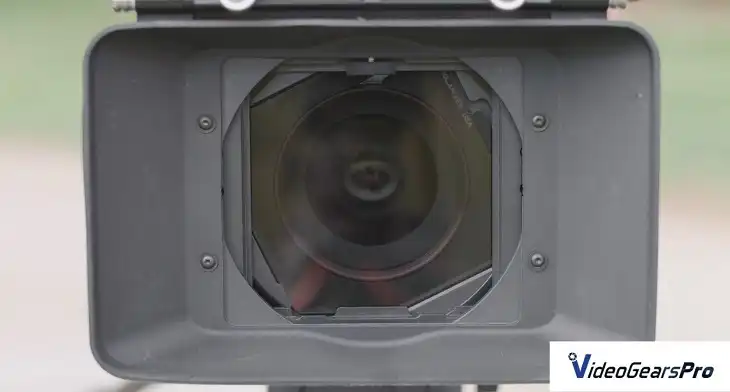
2. Proper Orientation In The Filter Tray
Now, here’s a pro tip that’ll save you some headaches: pay attention to how you slide that polarizer into the tray.
- Most 4×5.65 polarizers have a marking like “TOWARDS LENS” on one side. Make sure this side faces your lens when you insert it.
- If there’s no marking, the side with any branding or text should usually face away from the lens.
- Always handle your filter by the edges to avoid fingerprints and smudges.
Remember, improper orientation can lead to unwanted color shifts or reduce the effectiveness of the polarization. When in doubt, do a quick test shot to ensure you’ve got it right.
Adjusting the Polarization Effect
Now that your polarizer is mounted, it’s time to make it work for you. The magic of a polarizer happens when you rotate it, so let’s break down how to do this like a pro.
Rotating The Filter For Maximum Effect
- Start by looking through your viewfinder or at your monitor.
- Slowly rotate the filter and watch how the image changes.
- You’ll notice reflections appearing and disappearing, skies darkening or lightening, and colors becoming more or less saturated.
- The effect is strongest when the polarizer is at a 90-degree angle to the light source (often the sun).
Pro tip: The polarization effect is most noticeable when you’re at about a 35-degree angle to a reflective surface.
So, if you’re shooting a lake, for example, you’ll get the most dramatic results when you’re not shooting straight down at the water or directly at the horizon.
Using Geared Filter Holders For Precise Control
This is where cinema gear really shines. Many pro matte boxes come with geared filter holders, which are a game-changer for using polarizers. Here’s why they’re awesome:
- Precision: The geared mechanism allows for super fine adjustments.
- Smooth operation: No jerky movements to ruin your shot.
- Repeatable: You can mark positions for consistent results across multiple takes.
- Mid-shot adjustments: With practice, you can subtly adjust the polarization during a shot for dynamic effects.
To Use A Geared Holder
- Make sure your polarizer is securely in the rotating stage.
- Find the gear wheel on your matte box – it’s usually on the side.
- Use this wheel to smoothly rotate the filter.
- Some matte boxes have focus-style hard stops you can set for consistent rotation limits.
Remember, subtlety is key. A little rotation goes a long way, and you rarely need to spin the polarizer through its full range.
Best Practices for Using 4×5.65 Polarizers
Now that you’ve got the basics down, let’s dive into some pro tips to really make your 4×5.65 polarizer shine. These best practices will help you avoid common pitfalls and get the most out of your filter.
Checking For Vignetting
Vignetting can be a real mood-killer for your shots, especially with wide-angle lenses. Here’s how to keep it in check:
- Always test your setup before the actual shoot.
- Use your widest lens and rotate the polarizer through its full range.
- Keep an eye on the corners of your frame for any darkening.
- If you spot vignetting, try these fixes:
- Adjust your matte box position
- Use a larger anti-reflection ring
- Consider a step-up adapter for your lens
Avoiding Cross-Polarization With Other Filters
Stacking filters can lead to some funky results if you’re not careful. Here’s how to play nice with your other filters:
- If using multiple polarizers (like in a variable ND setup), align their polarization axes.
- When combining with other filters, place the polarizer closest to the lens.
- Be extra cautious with wide-angle lenses – you might see a cross-pattern in the sky due to uneven polarization.
Compensating For Light Loss
Polarizers typically eat up about 1-2 stops of light. Don’t let this catch you off guard:
- Factor this light loss into your exposure calculations.
- Consider bumping up your ISO or opening up your aperture to compensate.
- If you’re using a light meter, take readings with the polarizer in place.
- In low light situations, weigh the benefits of the polarizer against the need for more light.
Creative Applications
Now for the fun part – let’s explore some creative ways to use your 4×5.65 polarizer to elevate your cinematography.
Reducing Reflections And Glare
This is where polarizers really shine (or rather, reduce shine):
- Shooting through windows: Eliminate reflections for clean shots of interiors or car scenes.
- Water surfaces: Reveal what’s beneath the surface or maintain reflections – your choice.
- Shiny objects: Tame reflections on cars, glasses, or any polished surface.
Pro tip: The polarization effect is strongest at a 35-degree angle to reflective surfaces.
Enhancing Sky And Foliage
Want to make your outdoor shots pop? Here’s how:
- Deepen blue skies: Rotate the polarizer until you achieve the desired intensity.
- Enhance cloud contrast: Make those fluffy whites stand out against the blue.
- Saturate foliage: Bring out the rich greens in leaves and grass.
Remember: Be careful not to overdo it – you want enhanced, not unrealistic.
Controlling Contrast
Polarizers are secret weapons for managing your image’s overall contrast:
- Reduce atmospheric haze: Great for landscape shots to increase clarity.
- Balance exposure in mixed lighting: Tame reflections in shadowy areas.
- Create color separation: Useful when your subjects and background have similar tones.
Creative tip: Try slowly rotating the polarizer during a shot for a subtle, dynamic effect – like revealing a reflection or gradually deepening the sky.
Final Words
By mastering these applications, you’ll be able to use your 4×5.65 polarizer not just as a technical tool, but as a creative one.
It’s all about experimenting and finding what works for your unique vision. Remember, the best cinematographers know when to use these effects – and when to let nature speak for itself.
FAQs
1. How To Use A Polarizing Filter Properly?
Polarizers work best when positioned at a 90° angle to the sun, maximizing their ability to reduce glare and enhance colors.
2. What Is The Best Focal Length For A Polarizer?
A polarizer works best with a focal length of no less than 28mm in a 35mm format to avoid vignetting.
3. How To Shoot With A Circular Polarizer?
To shoot with a circular polarizer, simply screw the filter onto the end of your lens.
4. How Do You Adjust A Polarizer?
Adjust a polarizer by rotating it while looking at your camera’s LCD screen or viewfinder to achieve the desired effect.
5. How Many Stops Do You Lose With A Polarizing Filter?
Using a polarizing filter typically results in a loss of about 1.5 stops of light.
6. When Not To Use A Polarizing Filter?
Avoid using a polarizing filter in low light situations, as it further reduces the amount of light reaching the sensor.
What Focal Length To Avoid Distortion?
To avoid distortion, use a focal length of around 200mm.