Spot Meter Vs. Light Meter | Understanding Their Differences
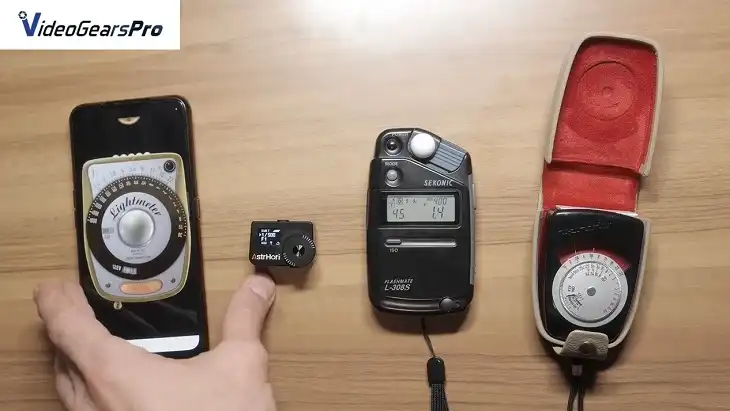
Great photography is all about light. Two gadgets that can really help you out here are spot meters and light meters. They both measure light, but they do it in different ways.
Knowing the difference between these two will help you pick the right tool for the job. In general, a light meter is any device that measures how bright things are.
There are two main types: incident meters, which measure the light hitting your subject, and reflective meters, which measure the light bouncing off your subject.
Spot meters are a special kind of reflective meter that only measures light from a tiny area, like a narrow beam. This article will explain how spot meters and light meters work, what they’re good for, and when you should use each one.
So, whether you’re a film photographer with a fancy old camera or you’re taking pictures with your digital camera, understanding these tools will help you take even better photos.
Understanding Light Meters
Ever wondered how professional photographers achieve those crisp, perfectly exposed shots? It all boils down to mastering the art of light. But fear not, aspiring shutterbugs! There’s a secret weapon in your photographic arsenal: the light meter.
Think of light meters as the ultimate companions for conquering the world of illumination. These nifty devices act like tiny light detectors, helping you capture your subject with the perfect balance of brightness.
Types: Incident and Reflective
Light meters come in two main types: incident and reflective. Incident light meters measure the intensity of light falling onto a subject.
They are positioned near the subject and aimed towards the light source, providing a direct measurement of the light illuminating the scene.
Reflective light meters, on the other hand, measure the light that is reflected off the subject. These meters are positioned near the camera and measure the light bouncing off the subject and surrounding elements.
How They Work
To understand how light meters operate, it’s essential to explore their specific methods:
Incident Meters
These meters measure the light falling on a subject by using a hemispherical dome that collects light from all directions. The reading indicates the amount of light available to illuminate the subject.
Reflective Meters
Reflective meters measure the light reflected from the subject or scene back to the camera. They analyze the light bouncing off the subject and surrounding areas, providing a reading based on the tonality and reflectance of the surfaces.
Advantages and Limitations
To grasp their practical implications, consider the following:
Advantages
Incident meters provide accurate exposure readings regardless of subject reflectance, making them ideal for studio and controlled lighting environments.
Reflective meters are versatile for a wide range of shooting conditions and can meter from a distance, simplifying exposure adjustments.
Limitations
Incident meters require positioning close to the subject and may not be suitable for measuring light in reflective or distant subjects.
Reflective meters can be influenced by the subject’s reflectance and surrounding light, potentially requiring exposure compensation for accurate readings.
Understanding these nuances helps photographers choose the right metering method based on their shooting scenarios and artistic goals.
Spot Meters in Detail
You have to understand spot meters’ specialized functionality before you can dive into their intricacies:
What is a Spot Meter?
A spot meter is a specialized type of light meter that measures the light intensity from a very narrow angle, typically 1 degree or less.
Unlike broader reflective meters, which assess overall scene brightness, spot meters provide precise readings of specific areas within the frame.
How It Works
Spot meters analyze light reflected from a small area of the scene, usually determined by the photographer’s selection.
By isolating and measuring specific points, photographers can determine optimal exposure settings for critical areas, ensuring precise control over highlights, shadows, and mid-tones.
When to Use a Spot Meter
Spot meters are invaluable in high-contrast situations where accurate exposure of specific elements is crucial.
They excel in landscape photography, architectural photography, and any scenario requiring precise control over exposure, such as capturing details in shadows or highlights.
Advantages and Limitations
To grasp their practical implications, consider the following:
Advantages
Spot meters allow photographers to meter precise areas of interest, ensuring correct exposure for critical elements in challenging lighting conditions.
They provide enhanced control over exposure settings, facilitating creative and technical precision in photography.
Limitations
Spot meters require careful placement and selection of the metered area, making them less suitable for quick, general exposure assessments.
They can also be challenging to use in fast-paced or dynamic shooting environments where scene lighting changes rapidly.
Understanding when and how to effectively use spot meters enhances a photographer’s ability to achieve desired lighting effects and maintain control over exposure outcomes in diverse shooting conditions.
Comparing Spot Meters and Light Meters
| Feature | Spot Meters | Light Meters |
| Measurement Angle | Very narrow (typically 1 degree or less) | Broad (encompassing entire scene or selected area) |
| Functionality | Measures light intensity from specific points or areas | Measures overall scene brightness or reflected light |
| Precision | Provides precise readings for isolated areas | Offers general exposure readings for broader scenes |
| Usage | Ideal for critical exposure control in high-contrast scenarios | Versatile across different shooting conditions |
| Applications | Best suited for landscape, architecture, and studio photography | Suitable for most photography genres and lighting conditions |
| Speed | Requires precise selection and placement, slower to use | Quick and straightforward for general exposure assessments |
| Complexity | Requires skill and practice to master | Easier to use, suitable for beginners and professionals alike |
| Flexibility | Offers detailed control over exposure settings | Provides versatility in various shooting environments |
Key Differences
Spot meters measure light from a narrow angle (typically 1 degree or less) of the scene, providing precise readings of specific areas.
They are used to target and meter small details within a frame, offering precise control over exposure.
In contrast, light meters encompass broader categories such as incident and reflective meters, measuring overall scene brightness or light falling on or reflected from subjects.
Situations Where Each Excels
To understand where each excels, consider their strengths:
Spot Meters
Excel in high-contrast scenes where precise exposure control of specific elements (like shadows or highlights) is crucial.
They are ideal for landscape photography to meter distant subjects or architectural photography to capture details in shaded areas.
Light Meters
Are versatile for general exposure assessments in various lighting conditions. Incident meters are preferred for studio setups or controlled environments where measuring direct light falling on subjects is essential.
Reflective meters are suitable for everyday photography where quickly assessing overall scene brightness and adjusting exposure accordingly is necessary.
Practical Examples
To illustrate their applications in real-world scenarios:
Spot Meters
A photographer using a spot meter in a landscape scene can meter the sky to avoid overexposure while maintaining details in shadows.
In portrait photography, a spot meter helps ensure accurate exposure on the subject’s face, especially in challenging lighting conditions.
Light Meters
When photographing a group portrait outdoors, a reflective light meter helps assess overall scene brightness and adjust exposure settings accordingly.
In studio photography, an incident light meter ensures consistent lighting across different setups by measuring direct light falling on the subject.
Choosing the Right Tool for Your Photography
To select the appropriate metering tool, consider the following:
Considerations for Different Photography Styles
Tailor your choice to specific photography styles:
Landscape Photography
For capturing expansive scenes with varying light conditions, a spot meter can help meter specific elements like distant mountains or details in shadows, ensuring balanced exposures.
Portrait Photography
Reflective light meters are valuable for assessing overall scene brightness and adjusting exposures to highlight facial details without overexposing backgrounds.
Studio Photography
Incident light meters are essential for precise control over studio lighting setups, ensuring consistent and accurate exposure across different lighting arrangements.
Budget Considerations
Factor in budget when choosing your metering tool:
Spot Meters
Generally more expensive due to their specialized functionality and precision in metering specific areas. They are a worthwhile investment for photographers who frequently encounter high-contrast scenes or require meticulous exposure control.
Light Meters
Reflective and incident light meters vary in price, with reflective meters often more affordable and suitable for general photography needs. Investing in a quality light meter ensures reliable exposure readings and enhances overall image quality.
Skill Level and Learning Curve
Consider the learning curve associated with each metering tool:
Spot Meters
Require a higher skill level to effectively use due to the need for precise metering and understanding of exposure zones.
Learning to interpret spot meter readings and apply them effectively takes practice but offers advanced control over exposure outcomes.
Light Meters
Reflective meters are more straightforward to use, making them suitable for photographers of varying skill levels.
Incident meters may require learning how to position and interpret light readings but provide accurate exposure measurements in controlled environments.
Final Words
In conclusion, mastering the use of spot meters and light meters is pivotal for photographers aiming to achieve precise control over exposure and lighting in their images.
Spot meters excel in scenarios requiring detailed exposure adjustments for specific elements, such as landscapes with varied light conditions or portraits with challenging contrasts.
On the other hand, light meters, whether incident or reflective, offer versatility across different photography styles and environments, from studio setups to outdoor shoots.
Understanding the nuances between these tools allows photographers to make informed choices based on their shooting needs, budget considerations, and skill levels.
FAQs
1. What Is The Difference Between Spot Meter And Light Meter?
The spot meter allows you to measure specific parts of a scene with precision, while a light meter provides an overall reading of light in a scene.
2. When Should You Use Spot Metering?
Spot metering is ideal when you need precise exposure control over a particular area of interest in a high-contrast scene, such as capturing details in shadows or highlights.
3. What Are The Two Types Of Light Meters?
There are two types of light meters:
Incident light meters measure the light falling on a subject.
Reflective light meters measure light reflected from the subject.
4. What Is The Benefit Of Spot Metering?
Spot metering allows photographers to meter specific areas accurately, ensuring correct exposure for critical elements without being influenced by the overall scene brightness.
5. What Are The Disadvantages Of A Light Meter?
Light meters, particularly reflective ones, may struggle with accurate readings in scenes with highly reflective or dark subjects, requiring adjustments to achieve correct exposure.
6. Should You Use A Light Meter?
Using a light meter can significantly enhance exposure accuracy, especially in controlled lighting setups or when shooting film, where precise exposure is crucial for achieving desired image quality.