Recording high-quality audio in vehicle interiors presents unique challenges, but with the right techniques and equipment, you can achieve professional results. This article will walk you through everything you need to know to capture clear, crisp audio in cars, trucks, and other vehicles.
Equipment Selection
Microphones
Choosing the right microphone is crucial for successful in-vehicle recording.
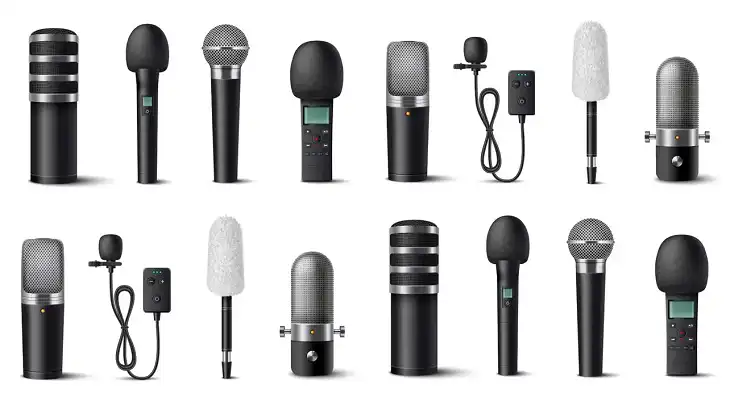
Different types of microphones excel in various scenarios:
- Lavalier microphones: These small, clip-on mics are ideal for recording conversations in the front seat, especially when discretion is required. They’re excellent for interviews and podcasting.
- Shotgun microphones: These highly directional mics are useful for capturing focused audio from a distance, particularly in larger vehicles or when you want to minimize ambient noise.
- Cardioid microphones: These versatile mics offer a good balance between directionality and ambient sound pickup, making them suitable for general-purpose recording in vehicles.
- Boundary microphones: Designed to be placed on flat surfaces, these mics are great for capturing ambient sound or conversations from the dashboard or center console.
- Plant microphones: These can be hidden in various locations throughout the car for a more natural sound, especially useful for documentary-style recordings.
When selecting a microphone, consider factors such as sensitivity, frequency response, and durability. For example, the Rode SmartLav+ is a popular lavalier microphone known for its clear sound and compatibility with smartphones. For a shotgun microphone, the Sennheiser MKE 600 offers excellent directional pickup and is compact enough for in-car use.
Audio Recorders and Interfaces
A reliable audio recorder or interface is essential for capturing high-quality sound in vehicles.
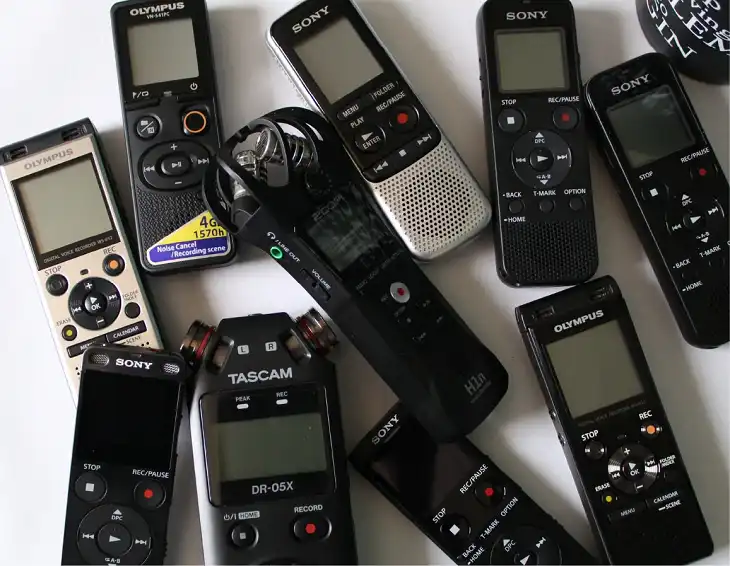
Look for devices with the following features:
- High-resolution recording capabilities (at least 24-bit/48kHz)
- Built-in wind noise reduction
- External microphone inputs
- Durable construction for mobile use
The Zoom H6 is a versatile recorder that meets these criteria and offers multiple XLR inputs for connecting different microphones. For a more compact option, the Tascam DR-40X provides excellent sound quality in a portable package.
Accessories
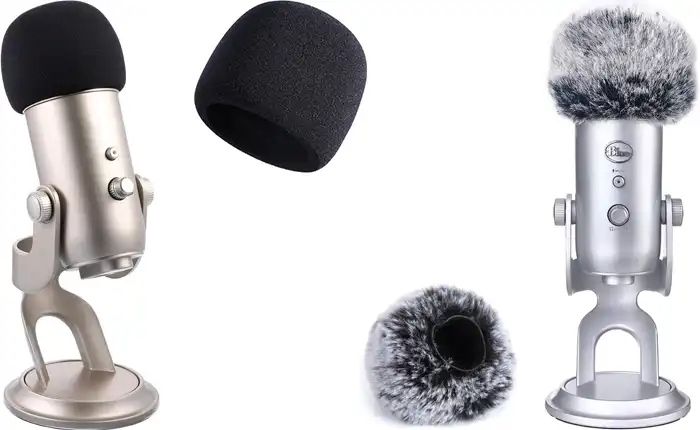
Don’t overlook the importance of accessories in achieving clear audio:
- Windscreens and pop filters: These are crucial for reducing wind noise and plosives. The Rycote Windjammer is an excellent choice for outdoor vehicle recording.
- Shock mounts: These isolate microphones from vibrations, which is essential in moving vehicles. The Rycote InVision Video Hot Shoe Shock Mount works well for many microphone types.
- Cables and adapters: Ensure you have the right connections for your equipment. High-quality, shielded cables can help reduce electrical interference from the vehicle’s systems.
Optimizing Vehicle Acoustics
Before you start recording, take some time to optimize the acoustic environment inside the vehicle:
- Identify problem areas: Listen for echoes and reverberations. Pay attention to hard, reflective surfaces like windows and the dashboard.
- Use sound-absorbing materials: Place foam panels or acoustic blankets strategically to reduce reflections. The headliner and rear parcel shelf are good spots to start.
- Consider removable treatments: Use suction cups to attach temporary acoustic panels to windows during recording sessions.
- Balance treatment with functionality: Ensure that any acoustic modifications don’t interfere with the vehicle’s operation or safety features.
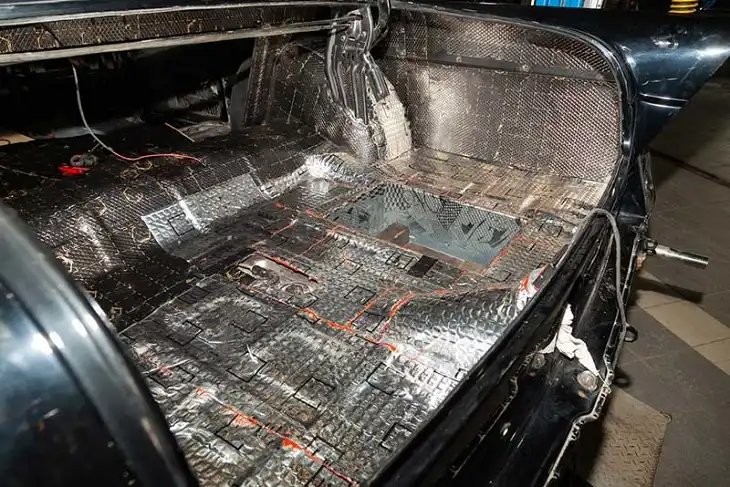
Remember, a little treatment goes a long way. Even small adjustments can significantly improve the sound quality of your recordings.
Microphone Placement and Techniques
Proper microphone placement is crucial for capturing clear audio in vehicles:
- For driver/passenger interviews: Clip lavalier mics to clothing at chest level, about 6-8 inches from the mouth. Alternatively, use a cardioid mic mounted on the dashboard, angled towards the speaker.
- For multi-person conversations: Use multiple lavalier mics or a centrally placed boundary microphone on the center console.
- To capture engine and road sounds: Place a cardioid or shotgun mic near the firewall (the wall separating the engine compartment from the passenger compartment) or in the wheel well for authentic engine and tire noise.
- For overall ambience: Mount a stereo microphone on the rear-view mirror or use two cardioid mics in an XY configuration on the dashboard.
Always consider driver visibility and safety when placing microphones. Use low-profile mounts and secure all equipment to prevent it from becoming a hazard in case of sudden stops or accidents.
Managing Background Noise
Dealing with background noise is one of the biggest challenges in vehicle audio recording. Here are some strategies to minimize unwanted sounds:
- Reduce road noise: Choose routes with smooth pavement and consider using tires designed for quiet operation.
- Minimize engine noise: If possible, record while the vehicle is stationary. For moving shots, use engine damping materials to reduce vibrations.
- Handle air conditioning and fan sounds: Turn off the AC and fans during recording if possible. If not, use directional microphones to focus on the desired sound source.
- Recording with windows open: Use windscreens and position microphones away from direct airflow. Consider using a baffle to redirect wind around the mic.
- Employ noise gates: Use a noise gate to automatically mute the audio when the primary sound source (e.g., a person speaking) is silent, helping to reduce constant background noise.
Recording Techniques
To ensure the best possible audio quality:
- Set appropriate gain levels: Start with your recorder’s gain at about 50% and adjust based on test recordings. Aim for peak levels around -12 dB to provide headroom for unexpected loud noises.
- Monitor audio constantly: Use headphones to listen to the audio in real-time, allowing you to catch and address issues immediately.
- Use a pre-recording checklist: Before each session, check battery levels, memory card space, microphone connections, and gain settings.
- Consider recording in mono: For speech recording, mono often provides clearer results and simplifies post-production.
- Record room tone: Capture 30 seconds of “silence” in the vehicle to use for noise reduction in post-production.
Post-Production and Audio Enhancement
Even with the best recording techniques, some post-production will likely be necessary:
- Noise reduction: Use software like iZotope RX or Audacity to reduce constant background noise.
- EQ adjustments: Boost frequencies around 2-4 kHz to enhance speech clarity, and cut low frequencies (below 80 Hz) to reduce rumble.
- Compression: Apply gentle compression (2:1 ratio, -3 dB threshold) to even out volume fluctuations.
- De-reverb: If echoes are present, use de-reverb tools to reduce their impact.
- Balance background noise: Retain some background noise for authenticity, but ensure it doesn’t overpower the primary audio.
Wrapping Things Up
Recording clear audio in vehicle interiors is challenging but achievable with the right approach. By selecting appropriate equipment, optimizing the acoustic environment, using proper recording techniques, and applying thoughtful post-production, you can capture professional-quality audio in any vehicle.
Remember that practice and experimentation are key to mastering these techniques. Each vehicle and recording situation will present unique challenges, so be prepared to adapt your approach as needed.