How to Spot Meter Successfully?
Mastering spot metering can elevate your photography from good to great, giving you precise control over exposure in challenging lighting conditions.
Unlike evaluative or matrix metering, spot metering measures light from a tiny area of your frame – typically just 1-5% – allowing you to zero in on the most important part of your image.
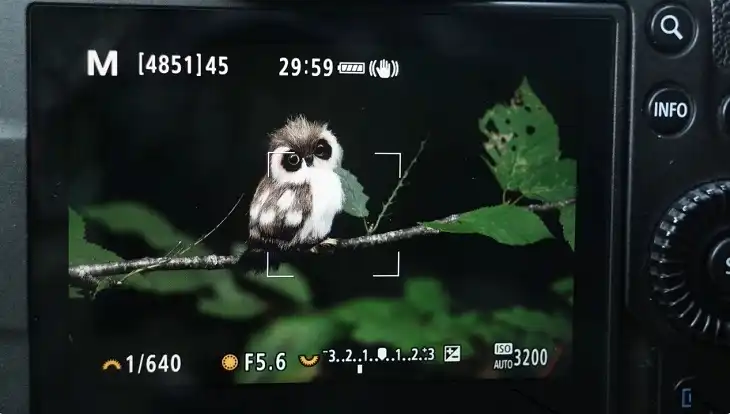
Whether you’re shooting a bride’s white dress in a dimly lit church or a dark bird against a bright sky, spot metering empowers you to nail the exposure every time.
In this guide, we’ll break down the essentials of spot metering, from understanding how it works to practical techniques you can start using today. By the end, you’ll have the knowledge to tackle even the trickiest lighting scenarios with confidence.
Understanding Spot Metering
Spot metering is a valuable technique that can significantly improve your photography, especially in challenging lighting conditions. This section explores how spot metering works, how it differs from other metering modes, and when to employ it for optimal results.
How Spot Metering Works
Spot metering measures light from a very small area of your frame, typically 1-5% of the total image area. Here’s a breakdown of the process:
- The camera isolates a tiny circular area, usually in the center of the viewfinder.
- It measures the light reflected from this specific spot.
- The camera calculates exposure based solely on this reading, disregarding the rest of the frame.
- The metered area is assumed to be a middle gray tone (18% reflectance).
This precision allows for accurate exposure of specific elements within your composition.
Spot Metering vs. Other Metering Modes
To fully appreciate spot metering, it’s helpful to understand how it compares to other common metering modes:
- Evaluative/Matrix Metering: Analyzes the entire frame, ideal for general-purpose photography.
- Center-weighted Metering: Emphasizes the central 60-80% of the frame, suitable for portraits.
- Partial Metering: Covers about 10-15% of the frame, a middle ground between center-weighted and spot metering.
Spot metering offers the highest level of precision among these options, giving photographers granular control over exposure.
When to Use Spot Metering
Spot metering excels in specific scenarios:
- High contrast scenes
- Backlit subjects
- Distant subjects (e.g., wildlife photography)
- Stage performances with dramatic lighting
- Portrait photography for accurate skin tones
- Landscape details requiring precise exposure
- Implementing the Zone System
While powerful, spot metering requires practice and a solid understanding of exposure principles. It may not be ideal for fast-moving subjects or rapidly changing light conditions.
By mastering spot metering, photographers can achieve precise exposures in situations where other metering modes might falter, resulting in images with improved detail and tonal range.
Steps to Successful Spot Metering
Practice and experience will help you develop an intuitive sense of when and how to apply these techniques effectively.
1. Choosing The Right Subject To Meter

Selecting the appropriate area to meter is crucial for successful spot metering. Consider the following guidelines:
Key subject:
In most cases, meter off the main subject of your image. This ensures that the most important element is correctly exposed.
Mid-tone areas:
When possible, choose areas that represent a middle gray tone. This aligns with the camera’s assumption and provides the most accurate reading.
Skin tones:
For portraits, meter off the subject’s face, preferably the cheek or forehead.
Highlights and shadows:
In high-contrast scenes, you may need to take multiple readings from both highlights and shadows to determine the optimal exposure.
Consistent lighting:
Ensure the area you’re metering is under the same lighting as your main subject.
2. Proper Camera Settings
To effectively use spot metering, configure your camera as follows:
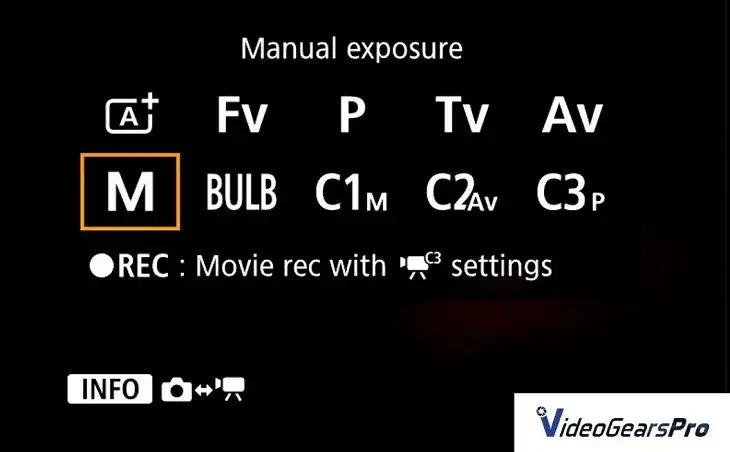
Metering mode: Select spot metering in your camera’s metering options.
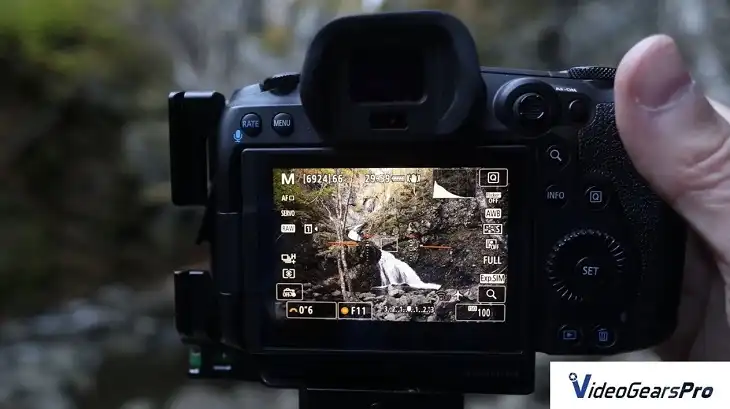
Exposure mode: Manual mode offers the most control, but aperture or shutter priority can also work well with spot metering.
ISO: Set this based on the available light and your desired image quality.
Autofocus point: Many cameras link the spot meter to the active AF point. If yours does, ensure the AF point is positioned over your desired metering area.
AE Lock: Familiarize yourself with your camera’s AE Lock function, as it allows you to meter, lock the exposure, and then recompose.
3. Compensating For Different Tones
Since the camera assumes the metered area is middle gray, you’ll need to adjust for subjects that are lighter or darker:
Light Subjects:
For subjects brighter than middle gray (e.g., snow, white clothing), increase exposure by 1-2 stops to prevent underexposure.
Dark Subjects:
For subjects darker than middle gray (e.g., black fabric, dark foliage), decrease exposure by 1-2 stops to prevent overexposure.
Extreme Contrast:
In scenes with very bright highlights and deep shadows, you may need to choose which areas to prioritize and potentially use techniques like exposure bracketing.
Reflective Surfaces:
Be cautious when metering off highly reflective or specular highlights, as these can lead to severe underexposure.
Color Influence:
Remember that color can affect perceived brightness. A saturated red or blue might require different compensation than a neutral tone of similar brightness.
Exposure Compensation:
Use your camera’s exposure compensation feature to quickly adjust for these tonal differences without changing your base exposure settings.
By carefully selecting your metering subject, setting up your camera correctly, and compensating for variations in tone, you can leverage spot metering to achieve precise exposures in a wide range of challenging lighting situations.
Common Challenges and Solutions
Here are some common challenges and solutions for spot metering
1. High Contrast Scenes
High contrast scenes, such as a landscape with both bright sky and deep shadows, can be tricky for spot metering.
Solution:
Use the Zone System to meter for the most important element. For landscapes, this is often the midtones.
Meter off a middle gray area, then adjust your exposure compensation for highlights and shadows. Alternatively, take multiple spot readings and average them for a balanced exposure.
2. Moving Subjects
Fast-moving subjects can make it difficult to obtain an accurate spot meter reading.
Solution:
Pre-meter on a similar tone that’s stationary (e.g., meter grass for a running animal). Use continuous autofocus and burst mode to increase your chances of a well-exposed shot.
In predictable situations, you can also use manual mode with pre-determined settings based on spot meter readings of the expected environment.
3. Backlighting
Backlit subjects are often underexposed when using automatic metering modes.
Solution:
Spot meter directly on the subject’s face or brightest part. You may need to apply positive exposure compensation (usually +1 to +2 stops) to properly expose the subject without blowing out the background.
Alternatively, spot meter the bright background and deliberately underexpose it by 2-3 stops to create a silhouette effect.
Note: For all these challenges, remember that spot metering gives you precise information, but interpreting that information and deciding how to use it is up to you as the photographer.
Advanced Techniques
Check out some advanced techniques on how to use spot meter.
Zone System Application
The Zone System, developed by Ansel Adams, can be powerfully combined with spot metering for precise exposure control.
- Understand the 11 zones: From Zone 0 (pure black) to Zone X (pure white), with Zone V as middle gray.
- Meter your subject and decide which zone it should fall into.
- Adjust your exposure accordingly. For example, if you meter a dark rock and want it in Zone III, you’d underexpose by 2 stops from the meter reading.
This technique is especially useful for high-contrast scenes and fine art photography.
Multiple Spot Readings
Taking multiple spot readings can help you understand the full range of tones in a scene.
- Meter the darkest important shadow and brightest important highlight.
- Note the difference in stops between these readings.
- Decide where to place these tones in your final image.
- Set your exposure to capture the desired range, potentially using graduated filters or planning for HDR if the range exceeds your camera’s capabilities.
This method helps ensure you capture detail in both highlights and shadows.
Bracketing With Spot Metering
Bracketing involves taking multiple shots at different exposures to ensure you get the right exposure.
- Take a spot meter reading of your main subject.
- Set up your camera’s auto-bracketing feature, typically for 3-5 shots at 1/3 to 1 stop intervals.
- Shoot the bracketed sequence.
- Review the results and choose the best exposure, or combine the images for HDR.
Bracketing with spot metering is particularly useful for tricky lighting situations or when you’re unsure about the optimal exposure.
These advanced techniques require practice but can significantly improve your ability to handle complex lighting scenarios and achieve your creative vision.
Practice Exercises
Now that you know how to use a spot meter, it is time to practice.
Indoor Spot Metering
- Still life setup:
- Arrange objects with varying tones (white, black, and mid-tone items).
- Practice metering each object and predicting how it will appear in the final image.
- Experiment with different exposures based on your spot meter readings.
- Window light portrait:
- Position a subject near a window.
- Meter the highlight on the subject’s face, then the shadow side.
- Try exposing for each and compare results.
Outdoor landscape metering
- Dynamic range exercise:
- Find a landscape with both bright sky and darker foreground.
- Take spot readings of the brightest clouds and darkest shadows.
- Determine if the range fits within your camera’s dynamic range.
- Practice exposing for different elements and blending if necessary.
- Sunset metering:
- During a sunset, take spot readings of the sun, sky, and foreground at regular intervals.
- Notice how quickly the light changes and practice adjusting your exposure accordingly.
Portrait Spot Metering
- Skin tone accuracy:
- Photograph subjects with different skin tones.
- Practice metering off the subject’s face, adjusting exposure as needed for accurate skin tone reproduction.
- Compare results with matrix metering to see the difference.
- Backlit portrait:
- Position a subject with strong backlighting.
- Meter the subject’s face and the bright background.
- Practice exposing for the face while managing background highlight detail.
- High-key and low-key portraits:
- Set up a high-key (bright, white background) and a low-key (dark background) portrait scenario.
- Practice using spot metering to achieve the desired effect while maintaining proper subject exposure.
For each exercise, try the following:
- Record your meter readings and camera settings.
- Take notes on your decisions and the resulting images.
- Review your results and reflect on what worked well and what could be improved.
These exercises will help you develop intuition for spot metering in various situations. Remember, consistent practice is key to mastering this technique.
Final Words
Mastering spot metering is crucial for photographers aiming to elevate their work in challenging lighting conditions. Understanding its mechanics, selecting the right metering subject, and configuring camera settings are key steps in achieving precise exposures.
By practicing these techniques, photographers can effectively manage high contrast scenes, backlighting, and dynamic landscapes, ensuring each shot captures detail and mood with accuracy.
Through dedication and experimentation, spot metering becomes a reliable tool for enhancing photographic quality and achieving artistic vision, making it indispensable for photographers striving to excel in diverse shooting scenarios.
FAQs
1. How Do You Spot Meter?
Spot metering involves using a small area in your viewfinder (often indicated by a dot or a small circle) and pointing it directly at your subject. This mode measures the light only in that specific spot to determine the exposure.
2. Where To Spot Meter?
You typically spot meter on the most important part of your scene where accurate exposure is crucial, such as the subject’s face in portrait photography or a particular highlight in a high-contrast scene.
3. Is Spot Metering Good?
Spot metering can be very effective in high-contrast situations where you want precise control over exposure. It helps to avoid overexposing or underexposing crucial areas of your photograph.
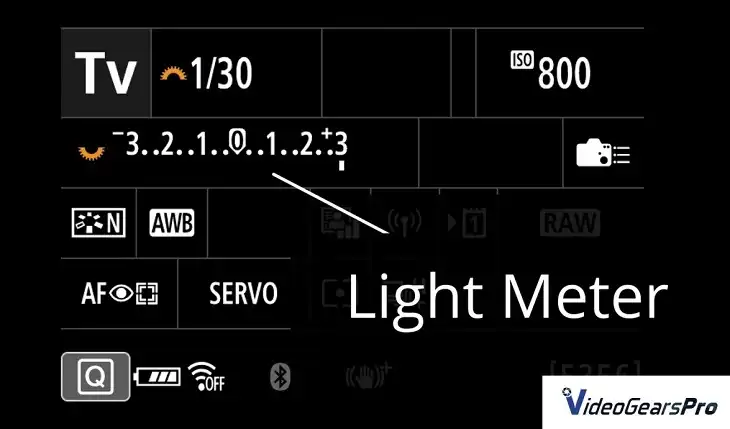
4. How Do I Know If My Light Meter Is Accurate?
To test your light meter’s accuracy, shoot a roll or several photos in various lighting conditions using the meter normally (not compensating intentionally), and compare the results with your expectations.
5. What Is The Best Metering Mode For Weddings?
Center-weighted metering is often preferred for weddings because it evaluates the exposure based on the center of the frame, which is generally where the main subjects are placed.
6. Can You Spot Meter With An iPhone?
Yes, spot metering on an iPhone is possible. You can touch the screen to focus on a specific object or area, which also adjusts the exposure based on that spot.
7. Should I Use Center-Weighted Or Spot Metering?
The choice between center-weighted and spot metering depends on your specific shooting conditions and artistic intentions. Use spot metering for precise control over exposure in specific areas, while center-weighted metering is more general and evaluates a larger area around the center.