How to Connect Shure MV7 to Camera
Connecting a high-quality microphone like the Shure MV7 to your camera allows you to capture great audio to match the great video quality of modern cameras. However, getting your Shure mic hooked up properly takes a little know-how.
In this guide, I’ll cover the two main methods for connecting your Shure MV7 to any DSLR, mirrorless, or video camera – using either the 3.5mm headphone output or XLR connection.
I’ll also provide tips for configuring your Shure microphone for the best possible audio recording quality. Read on to learn everything you need to seamlessly integrate the exceptional Shure MV7 into your camera rig!
Methods to Connect Shure MV7 to Any DSLR or Mirrorless Digital Camera
Connecting professional microphones like the Shure MV7 to your camera opens up possibilities for capturing great audio. But how exactly do you interface these high-end mics with consumer and prosumer cameras that don’t have XLR inputs?
Fortunately, there are straightforward ways to hook up your Shure MV7 to any make and model digital camera.
Method 1: Using the 3.5mm Headphone Output
You can connect the Shure MV7 to your camera using a 3.5mm aux cable from the mic’s headphone output into the camera mic input.
This approach allows integration of the onboard processing power of the Shure MV7 when connected to an external video camera or recording device.
Equipment needed:
- Shure MV7 microphone
- 3.5mm male-to-male stereo audio cable
- Camera with mic input (3.5mm)
- Phone, tablet, or computer to power MV7 over USB
Steps to connect:
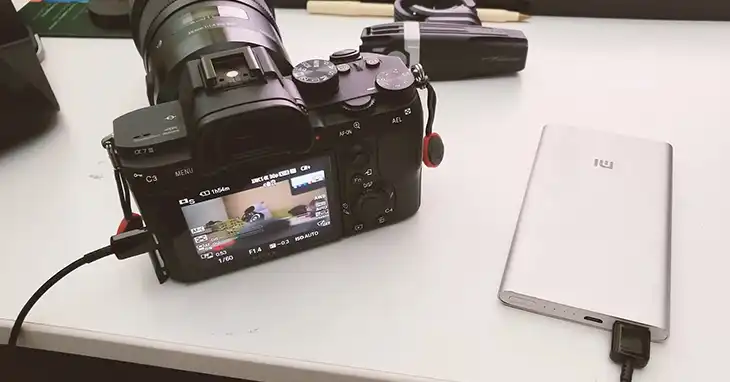
- Since the camera cannot power the MV7, you’ll need to connect it to a computer, phone, or tablet using the included USB cable.
- Use a 3.5mm TRS cable (stereo mini-jack) to connect the headphone output on the MV7 to the microphone input on your camera. Make sure you don’t plug it into the camera’s headphone jack.
- Disable mic bias voltage on the camera to avoid noise. Because the DC voltage (2-5V) can cause unwanted noise
- Set low gain on camera, high gain on MV7 headphone output
The advantage of using the headphone output method is you can take full advantage of the MV7’s internal preamp, compressor, EQ adjusting, etc. to shape the sound before sending it to the camera. Always test the record first when wired this way to verify acceptable audio quality before the actual shooting.
With the right gain staging from microphone to camera, this approach allows harnessing the MV7’s high-end audio tools when recording video, with the tradeoff of potential noise without proper disabling of bias voltage.
Method 2: Using the Shure A96F Cable (XLR Connection)
We recommend using the Shure A96F cable for connecting the MV7 to your camera’s XLR input. This specialized cable adapts the balanced XLR output from the Shure microphone for direct integration with consumer camera mic inputs.
The key benefit of the A96F approach is that you can plug the MV7 directly into the camera without needing to provide separate USB power to the microphone.
Here is what you’ll need:
- Shure MV7 microphone
- Shure A96F XLR cable
- Camera with stereo microphone input (3.5mm)
Steps to connect using the A96F cable:
- Connect the A96F cable: This cable is designed to connect XLR microphones to cameras with a 3.5mm stereo microphone input. Connect the XLR output of the MV7 to the XLR connector on the A96F cable.
- Connect to the camera: Plug the 3.5mm TRS connector on the A96F cable into the microphone input on your camera.
With this cabling configuration, the MV7 connects to the camera input without needing separate power. However, the advanced mic controls and DSP features are bypassed.
So while levels and basic gain adjustment are possible in-camera, you lose the ability to change settings like voice isolation, EQ, compression, etc.
Additionally, since the signal is taken before hitting the MV7’s internal preamp and A/D converter, significantly more gain may be required on the camera to boost levels for proper recording volume.
Overall, the Shure A96F cable provides a streamlined way to hook up the MV7 directly to camera mic inputs. But certain audio quality tradeoffs exist from bypassing the mic’s onboard processor and controls.
How to Configure Shure MV7 for Better Audio Quality
When connecting the Shure MV7 to your camera via the headphone output method, the following mic settings are recommended for optimizing audio quality:
Set Gain Staging: To minimize background noise pickup in the recording, set the audio gain low on the camera while turning up the MV7’s headphone volume to the maximum level. This boosts the microphone signal before sending over the unbalanced 3.5mm connection.
Utilize Onboard Processing: A key benefit of routing through the MV7 first is access to its built-in preamp, voice isolation, compressor, EQ, and limiting before sending audio to the camera. Enable these processing tools to shape and optimize the sound.
Follow Best Practices: Adhere to proper mic placement guidelines, record in a quiet space, utilize a windscreen, and disable any bias voltage from the camera. Careful technique and environment combined with dialed-in MV7 settings ensure great results.
Can I Connect Shure MV7 to the Camera with a USB Cable?
The Shure MV7 microphone connects to computers via an included USB-C to USB-A cable to provide both power to the microphone as well as a digital audio interface.
However, the question arises – can the MV7 interface directly with cameras through its USB connection?
Unfortunately, the vast majority of digital cameras, including DSLRs and mirrorless models, do not support audio input over USB. So you cannot directly connect the Shure MV7 to a camera via USB cable as a method of integrating the microphone.
While some very high-end cinema video cameras feature USB-C ports that allow digital audio integration – such as the Panasonic BS1H – consumer and even prosumer camera bodies lack any ability to interface with microphones through USB.
So USB cabling can power the MV7 and provide computer connectivity but serves no purpose for directly wiring the mic to standard cameras.
Instead, you need to use the analog 3.5mm or XLR connections outlined in the above methods in order to successfully hook up the Shure MV7 directly to your camera.
Closing Thoughts
So at the end of the day, I’m super stoked that this superb microphone is fully integrated with my modest DSLR camera using just some basic cabling. Who knew it was so straightforward? Now I have unmatched vocal audio quality in my videos to share with the world. I hope my firsthand experience getting the MV7 hooked up can help anyone else wanting to pair high-end mics with their existing gear. Feel free to hit me up in the comments if you have any other questions – I’m always happy to nerd out over video production!

