As photographers, we’ve all been there – eagerly anticipating that perfect shot, only to be thwarted by a sticky iris ring that refuses to cooperate. The frustration of struggling with an unresponsive aperture can quickly turn a dream shot into a nightmare. But fear not, for with the right knowledge and care, you can restore your lens to its former glory and regain control over your creative vision.
What is an Iris Ring
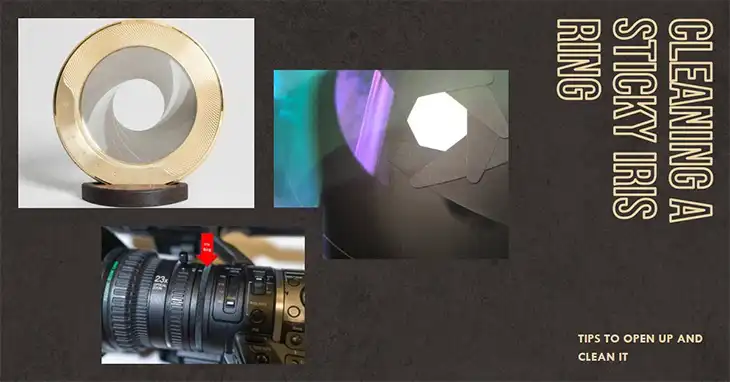
At the heart of every camera lens lies the iris ring, a crucial component that governs the aperture and, consequently, the amount of light entering the lens. This intricate mechanism works in tandem with the aperture blades, enabling you to adjust the size of the opening and control depth of field, exposure, and overall image quality.

What Causes Sticky Iris Ring
Over time, even the most meticulously maintained lenses can fall victim to a sticky iris ring. Dust and debris can accumulate within the delicate mechanisms, while lubricants break down due to age or environmental factors. External contaminants like moisture, dirt, or oil can also find their way inside, causing the iris ring to seize up. Improper storage or handling practices can exacerbate these issues, leading to a frustrating photography experience.
Signs of a Sticky Iris Ring
If you’ve noticed uneven or hesitant aperture changes, or if the aperture seems completely stuck, it’s likely that your lens is suffering from a sticky iris ring. Additionally, visible grime or residue around the iris ring mechanism can be a telltale sign of trouble brewing.
Why You Should Clean Your Sticky Iris Ring Right Away
Ignoring a sticky iris ring can have severe consequences for your photography. Not only will you experience degraded image quality due to incorrect aperture settings, but forcing the mechanism can potentially cause permanent damage to your lens. Ultimately, neglecting this issue can significantly reduce the lifespan and performance of your valuable photography equipment.
Importance of Cleaning and Maintenance
Regular cleaning and maintenance are essential for ensuring the longevity and optimal performance of your camera lenses. By taking the time to properly address a sticky iris ring, you can restore your lens to its former glory, enabling you to capture stunning images with precise control over aperture and depth of field.
Preparation for Cleaning Iris Ring
Before you dive into the cleaning process, it’s crucial to gather the necessary tools and materials and prepare a suitable workspace. Remember, safety should always be your top priority when handling delicate camera equipment.
Safety Precautions
- Work in a clean, well-lit, and dust-free environment to prevent further contamination.
- Avoid touching the lens elements directly with your fingers, as oils and residue can easily transfer.
- Use only recommended cleaning solutions and materials specifically designed for camera lenses.
Tools and Materials
To tackle a sticky iris ring, you’ll need the following tools and materials:
- Cleaning solution (e.g., lens cleaning fluid, diluted isopropyl alcohol, or a mild soap and water mixture)
- Cotton swabs or microfiber cloths
- Rocket blower or compressed air duster
- Lens cleaning tissues or lens pen (optional)
- Specialized lens tools (e.g., spanner wrenches, lens spanners, or lens removal tools) if disassembly is required
Preparing the Workspace
- Clear a flat, stable surface to work on, ensuring ample space and good lighting.
- Consider using a lens cleaning mat or towel to prevent scratches or accidental drops.
- Have all tools and materials within easy reach for a smooth cleaning process.
Disassembling the Lens for Cleaning
In some cases, disassembling the lens may be necessary to access and thoroughly clean the iris ring mechanism. However, this step should only be undertaken if you possess the necessary knowledge and experience, as improper disassembly can lead to further damage or even render your lens inoperable.
Assessing the Need for Disassembly
Before attempting any disassembly, carefully assess the severity of the stickiness and consult the manufacturer’s instructions or repair manuals for your specific lens model. If the issue seems minor or the lens is particularly complex or expensive, it may be wiser to seek professional assistance.
Disassembly Instructions (if applicable)
If disassembly is deemed necessary and you feel confident in your abilities, follow these general guidelines:
- Consult the manufacturer’s instructions or repair manuals for your specific lens model.
- Take detailed photographs or notes throughout the process to ensure proper reassembly.
- Handle delicate components with extreme care, using the appropriate tools and techniques.
- Proceed slowly and methodically, taking breaks as needed to avoid frustration or mistakes.
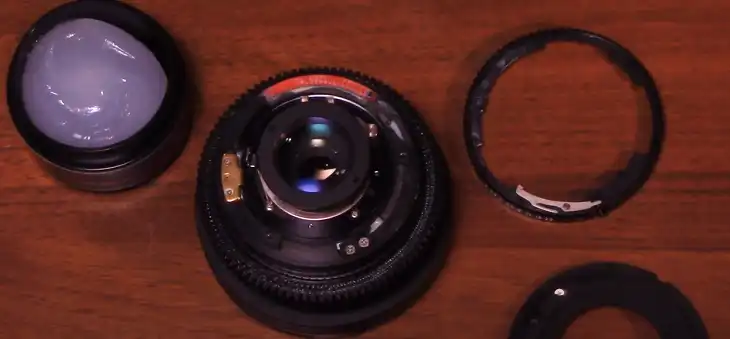
Accessing the Iris Ring Mechanism
Once the lens is disassembled, carefully locate and access the iris ring mechanism. Depending on the lens model, this may involve removing additional components or subassemblies. Exercise caution and refer to the manufacturer’s instructions to avoid potential risks or damage.
Cleaning the Iris Ring
Whether you’ve disassembled the lens or are working with the accessible components, the cleaning process requires patience, precision, and the right techniques.
Preparing the Cleaning Solution
Start by preparing a safe and effective cleaning solution. Here are a few options:
- Lens cleaning fluid: Follow the manufacturer’s instructions for dilution and use.
- Diluted isopropyl alcohol: Mix one part isopropyl alcohol (91% or higher) with three parts distilled water.
- Mild soap and water: Create a dilute solution using a few drops of mild dish soap and distilled water.
Always use solutions compatible with the lens materials and avoid harsh chemicals or solvents that could damage the lens coatings or components.
Cleaning the Exterior
- Gently wipe down the exterior of the lens and the visible portions of the iris ring with a microfiber cloth or cotton swabs dampened with the cleaning solution.
- Avoid introducing excess liquid into the lens or scrubbing too vigorously, as this could force contaminants deeper into the mechanisms.
Cleaning the Inner Mechanism
If you haven’t disassembled the lens, carefully clean the accessible parts of the iris mechanism using the following steps:
- Moisten a cotton swab with the cleaning solution, ensuring it’s not dripping wet.
- Gently swab the exposed areas of the iris ring mechanism, taking care not to force the mechanism or introduce any liquid inside the lens.
- Use a clean, dry cotton swab or microfiber cloth to remove any remaining moisture or residue.
Cleaning Stubborn Residues
For stubborn sticky residues or grime buildup, you may need to employ additional techniques or specialized tools. Consider using a lens cleaning pen or lens brush to gently agitate and remove the residue. However, exercise extreme caution and avoid applying excessive force or pressure, which could damage the delicate components.
Drying and Lubricating
Once the cleaning process is complete, thoroughly dry all components using a clean, lint-free cloth or compressed air duster. If recommended by the manufacturer, apply a small amount of the appropriate lubricant to the iris ring mechanism to ensure smooth operation.
Testing and Aftercare
Even if disassembly wasn’t required, it’s essential to thoroughly test the functionality of the cleaned iris ring and implement proper storage and maintenance practices to prevent future issues.
Testing Functionality
- Mount the lens on your camera and manually adjust the aperture through its full range, observing for smooth and consistent operation.
- Test the aperture performance in various lighting conditions and at different aperture settings.
- If any issues persist, repeat the cleaning process or seek professional assistance if necessary.
Storage and Maintenance
Proper storage and maintenance are key to prolonging the life of your camera lenses and preventing future sticky iris ring issues:
- Store lenses in a cool, dry, and dust-free environment, preferably in airtight containers or lens cases.
- Periodically clean and inspect lenses, even when not in use, to prevent buildup of contaminants.
- If recommended by the manufacturer, perform regular lubrication and maintenance to ensure smooth operation of the iris ring and other mechanisms.
Final Thoughts
Maintaining your camera lenses is not only essential for capturing stunning images but also for preserving the longevity and value of your photography equipment. By following the steps outlined in this guide, you can confidently tackle a sticky iris ring and restore your lens to its former glory.
Remember, your camera lenses are precision instruments, and with proper care and attention, they can serve you faithfully for years to come. Don’t let a sticky iris ring hinder your creative vision – take action and reclaim control over your photography experience.