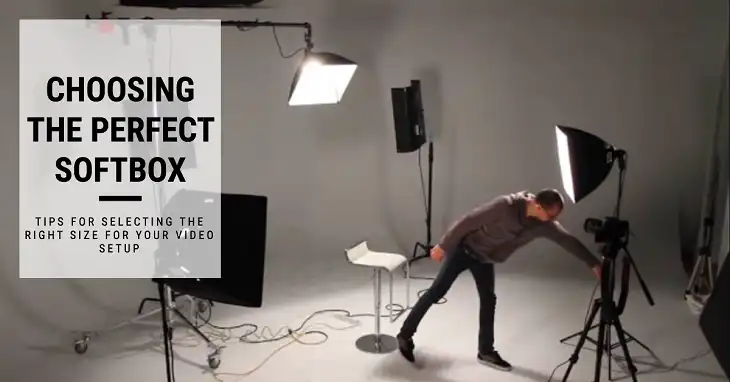
How to Choose the Right-Sized Softbox for Your Video Setup
Lighting can make or break your video production. Among the various tools at your disposal, softboxes stand out as essential equipment for creating professional-looking footage. These versatile light modifiers diffuse harsh light, creating a soft, flattering illumination that enhances the quality of your videos. However, selecting the correct size softbox for your specific needs can be challenging.
The key to choosing the right-sized softbox lies in understanding your setup’s requirements, the space you’re working with, and the effect you want to achieve. This article will walk you through the process of selecting the perfect softbox size, ensuring your video lighting is top-notch.
Softbox Sizes Breakdown
Softbox sizes are typically measured in inches or feet, with the most common sizes ranging from 12×16 inches to 4×6 feet. Here’s a breakdown of standard sizes and their typical applications:
| Size (inches) | Typical Use |
| 12×16 to 16×22 | Product photography, headshots |
| 24×32 to 36×48 | Portraits, small group shots |
| 48×72 and larger | Full-body shots, large groups |
The size of your softbox directly impacts the spread and quality of light. Larger softboxes produce a softer, more even light spread, while smaller ones create a more focused, slightly harder light. This relationship between size and light quality is due to the principle of relative light size: the larger the light source in relation to the subject, the softer the light appears.
Shape Considerations
Softboxes come in various shapes, with square and rectangular being the most common. The shape you choose can affect the catchlights in your subject’s eyes and the overall light spread.
Square softboxes produce even light distribution and square catchlights, ideal for headshots and product photography. Rectangular softboxes offer a wider spread of light, making them suitable for full-body shots or lighting larger areas.
How to Match Softbox Size to Your Setup
Small Setups
For compact setups like home studios or vlogging corners, smaller softboxes in the range of 16×22 inches to 24×32 inches work well. These sizes provide enough diffusion for a single subject without overwhelming your space.
Example setup for a small space:
- Main light: 24×32 inch softbox
- Fill light: 16×22 inch softbox
- Hair light: 12×16 inch softbox or strip box
Medium Setups
Mid-sized setups, such as those used for small-scale productions or interviews, benefit from softboxes in the 36×48 inch to 48×72 inch range. These sizes offer ample light spread for two to three subjects while maintaining portability.
Example setup for a medium space:
- Key light: 48×72 inch softbox
- Fill light: 36×48 inch softbox
- Background light: 24×32 inch softbox
Large Setups
For large-scale productions or studio environments, consider softboxes 4×6 feet and larger. These sizes provide expansive, even lighting for multiple subjects or large sets.
Example setup for a large space:
- Main light: 6×8 foot softbox
- Fill light: 4×6 foot softbox
- Accent lights: 3×4 foot softboxes
Specific Use Cases
Different video projects may require specialized lighting approaches:
Product photography: Use small to medium softboxes (16×22 to 36×48 inches) positioned close to the product for crisp, even lighting.
Portraiture: Medium-sized softboxes (36×48 to 48×72 inches) placed at a 45-degree angle to the subject create flattering, soft light.
How to Fine-Tune Your Softbox Setup Using Modifiers
To further control your lighting, consider these modifiers:
Grids
Grids attach to the front of your softbox, narrowing the beam of light and reducing spill. They’re particularly useful when you need to control light direction precisely or create dramatic lighting effects.
Grid sizes typically range from 10 to 50 degrees, with smaller numbers indicating a tighter beam of light:
- 10-20 degree grids: Ideal for accent lighting or hair lights
- 30-40 degree grids: Suitable for main lights in controlled setups
- 50 degree grids: Offer a wider spread while still maintaining direction
Diffusers
Additional diffusion material can be added to your softbox to further soften the light. This is especially useful with larger softboxes when you want to create an ultra-soft light source.
Honeycombs
Similar to grids but with a different pattern, honeycombs help shape the light beam while maintaining a round catchlight. They’re excellent for creating a spotlight effect or controlling light spill in tight spaces.
How to Properly Create Your Softbox Setup
Distance and Angle
The distance between your softbox and the subject affects the light’s intensity and spread. As a general rule, the closer the softbox, the softer the light. However, moving the softbox too close can create hotspots.
For optimal results:
- Position the softbox at a 45-degree angle to the subject for flattering shadows
- Experiment with distances between 3-6 feet for a balance of softness and definition
- Adjust the height so the center of the softbox is slightly above eye level for most subjects
Softbox Stands
Invest in sturdy stands that can support the weight of your softboxes. Look for stands with:
- Maximum height of at least 7-9 feet
- Load capacity that exceeds your softbox weight by at least 50%
- Sand bags or counterweights for added stability
Power Considerations
Ensure your light source has enough power to illuminate your subject properly through the softbox. As a general guideline:
- For small softboxes (up to 24×32 inches): 200-400 watt seconds
- For medium softboxes (36×48 to 48×72 inches): 400-800 watt seconds
- For large softboxes (4×6 feet and larger): 800-1600 watt seconds or more
Frequently Asked Questions
How far away should a softbox be?
The distance between the softbox and your subject depends on the desired light intensity and spread. Generally, closer distances result in a more concentrated and intense light.
What is the best lighting angle for video?
The ideal angle for a softbox depends on the desired effect. For a more natural look, position the softbox at a 45-degree angle to your subject. To create a more dramatic effect, try positioning it directly above or below your subject.
Where to position softbox lighting?
The placement of your softbox(es) will depend on the desired lighting setup (e.g., three-point lighting, high-key lighting, low-key lighting). Experiment with different positions to achieve the desired effect.
Which is better, ring light or softbox?
Both ring lights and softboxes have their advantages. Ring lights offer a unique circular light pattern, while softboxes provide a more versatile and customizable lighting experience. The best choice depends on your specific needs and preferences.
Bottom Line
Selecting the right-sized softbox for your video setup is crucial for achieving professional-looking results. Consider your space, subjects, and desired lighting effects when making your choice. Remember that larger softboxes generally produce softer light, while smaller ones offer more control and portability.
Don’t be afraid to experiment with different sizes and configurations to find what works best for your specific needs. With the knowledge gained from this guide, you’re well-equipped to make informed decisions about your softbox lighting and elevate the quality of your video productions.